
If you find yourself needing to remove the window tint from your vehicle it can be a little nerve-wracking at first. How do you take something that’s glued to your window off without creating a big mess and a ton of work?
Compounding the problem is that there’s a lot of bad advice out there. We’ve helped people remove hundreds of window tints (usually from a subpar install), and we’ve harnessed that expertise into our guide here. We’ll walk you through the best way to remove the window tint from your vehicle for you here.
Why Would Someone Want to Remove Window Tint?
While window tint can offer quite a few advantages, the truth is that there are multiple reasons why someone might want or need to remove it from their car or truck.
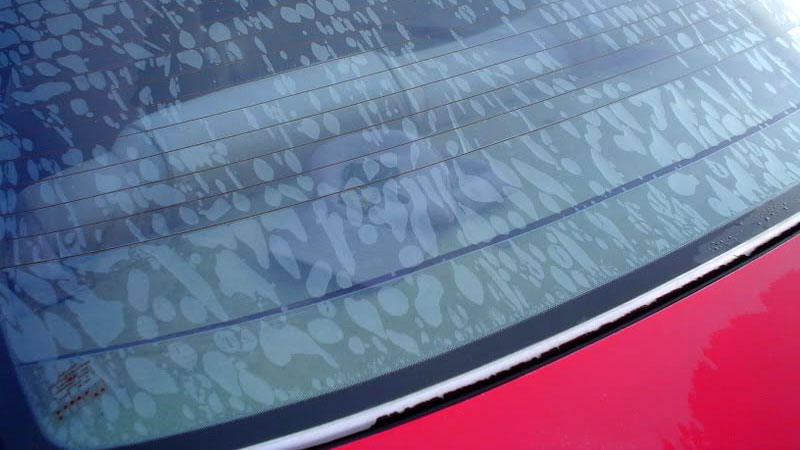
For starters, window tint doesn’t last forever. Whether it’s from an poor install or the window tint has simply been on the vehicle for a long time, it can start to bubble up, discolor, or people can end up scratching it.
When this happens, it becomes an eyesore and can be challenging to see through. And when this happens, unfortunately the only solution is to remove the old window tint and install new stuff.
Another reason you might need to remove old window tint is you get a ticket for it being too dark or if you’re trying to stay ahead of things, to stay on the right side of the law. Tint laws in the United States vary by state, so if you move or purchase a vehicle from another state you might need to remove the existing tint.
Finally, you might want to remove the existing tint just so you can install a new tint! Perhaps you want it a bit darker or you don’t like just how dark it is or you simply want to try a new type of tint. Either way to get what you want you need to remove the old tint first.
Is Removing Window Tint From Your Car Difficult?
Typically, removing window tint from your car is not a difficult process. However, it’s important to get the right tools and materials to make the job go as seamlessly as possible.
Other factors that affect how difficult it will be to remove the window tint include the quality of the tint, the quality of the installation, and how long the tint has been on the vehicle.
If you can start to remove the tint and keep it all in one piece as you peel it off, it’s a pretty simple process. However, if the window tint starts to peel or strip off then it can go from an easy job to a nightmare in no time.
Will Removing Window Tint Damage the Defroster?
While window tint removal is generally a pretty straightforward process, if you’re removing window tint from a window with a defroster, you need to be extremely careful. It’s very easy to damage the defroster lines on the vehicle.
The most common way people damage defroster lines during the removal process is with the scraper. As you push down to get behind the tint, it’s easy to nick or lift the defroster lines too. Even a small cut on those lines will prevent them from working properly.
But while that’s the most common way people damage defroster lines when removing window tint, it’s possible for the adhesive of the tint to stick to the defroster lines and pull it up. This is why it’s important to loosen up the glue a bit before removing it from the window.
BEST Way to Remove Window Tint From Cars
While there are a few different methods you can use to get the window tint off your car, if you want to do it like the professionals, this is the method you want to use. Not only does it make the process as easy as possible, but it will also give you the most consistent results.
1. Roll Down the Window a Bit
During this step, you don’t need to roll down the window all the way. Instead, giving yourself an inch or two of access along the top edge of the window is all you need. This lets you access the “lip” of the tint, making it far easier to start the peeling process.
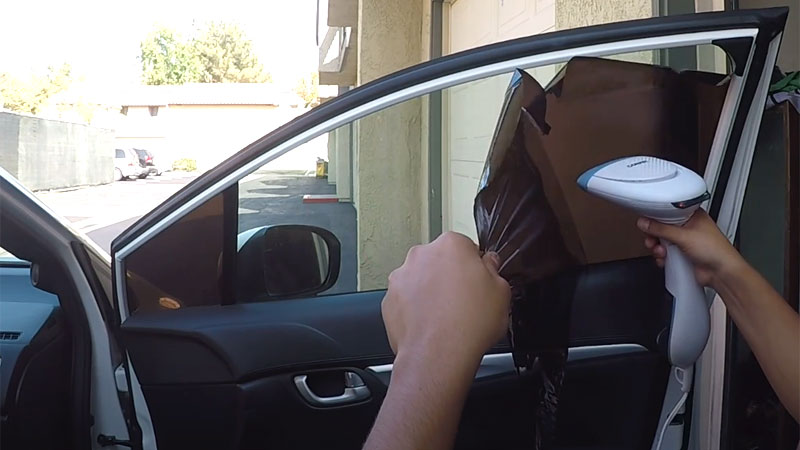
2. Use a Steamer
Once you have the window down a bit, it’s best to use a steamer to loosen up the glue a bit. You don’t need anything fancy. A simple handheld steamer (like this one) or something you’d find at Walmart is totally fine.
You want to use the steamer on the entire window but focus on the edges just a bit more. This is where you’re going to start the next step and having it a little extra loose will make it easier for you.
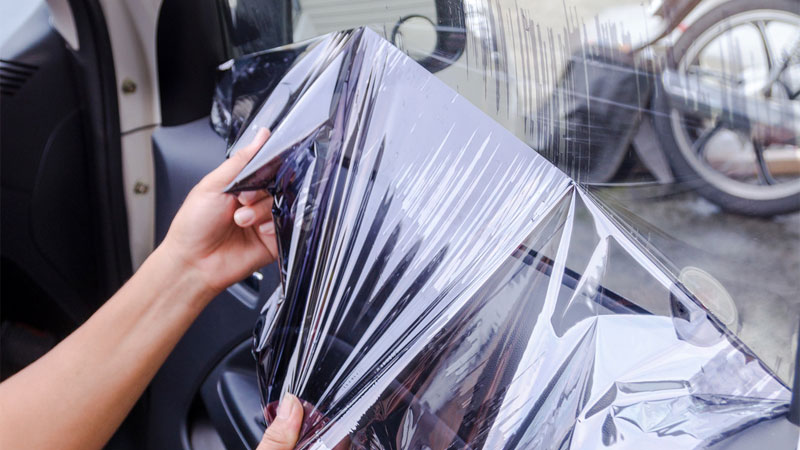
3. Start Peeling With a Razor
Once you have thoroughly steamed the window it’s time to move on to the next step. During this step you want to use a quality razor blade scraper along the top edge of the window tint. Get the razor blade behind the tint and slowly push it down.
The goal is to get behind the tint and lift it off the glass without making it separate and peel from the rest of the tint on the window.
4. Slowly Pull It Off
Once you get the window tint starting to peel, start to slowly peel it down and across using your hand. During this time, you want to do your absolute best to keep it all in one piece. If it does start to peel, you’ll need to jump back to peeling it with a razor blade scraper to get behind the tint again.
Once you get the tint about halfway down the window, roll the window all the way back up so you can remove it from the very bottom portion of the window when you get to that point.
5. Remove the Glue Residue
After you remove all the tint from the window, all that’s left is to remove any glue residue that is still on the window. The amount of glue residue left on the window will vary depending on the product you use.
But to get the glue residue off the window, you’ll want to use a window adhesive remover like Goo Gone (good) or 3M Adhesive Cleaner (better). Along with a scraper, these products will break down the glue on the window without damaging the window itself, making it much easier to complete the job.
An alternative method is to clean the window with a self-made solution using acetone or vinegar, but professional products make it a lot easier for you.
Here’s a good video of the general process:
Alternate Removal Methods
While the above method is the best way to remove window tint from your vehicle, it’s not the only method out there. Below we’ve highlighted three different methods you can use to successfully remove window tint from your vehicle.
Hair Dryer/Heat Gun
Heat naturally loosens up glue, and sometimes all you need to loosen up the adhesive on your window is to apply a bit of heat! A heat gun is the best option for this, but if you don’t have a heat gun on hand, a hair dryer will do the trick too.
Just like with a steamer, if you’re using a heat gun or a hair dryer, you want to work the entire window but pay a little extra attention to the edges where you’re going to start.
Ammonia, Soap, and Water
Ammonia will naturally break down the adhesive holding the window tint on, but the key here is getting underneath the tint so the ammonia can work its magic.
Start with the razor blade to peel up the tint a bit, then spray the ammonia, soap, and water mixture behind the tint so it can start to break it down and make it easier to peel.
Just the Razor Blade
Depending on how long the window tint has been on your vehicle and the weather outside, you might not need to loosen up the adhesive before jumping in with the razor blade. This is especially true during the warmer months when the hot weather will naturally loosen up the adhesive a bit.
However, while you might not need to loosen up the adhesive with heat or ammonia, it will always make things a bit easier if you do.
How to Get Window Tint Glue Off
Once you get the actual window tint off your vehicle, there’s a good chance you’ll have at least some window tint glue on the window. In the best-case scenario, there will only be a bit of glue along the window, but it’s also possible to have a thin coating along the entirety of the window.
You can use a homemade solution of acetone and vinegar for small glue spots, but if you have a lot of glue on your windshield, you’ll want to save yourself a bit of time and frustration by getting a professional product.
There are a lot of options out there, but the Gila FR200 Window Film Removal Tool Kit is one of our favorite options out there. If that’s not available, the aforementioned 3M Adhesive Cleaner or Goo Gone are the next best thing.
Professional Window Tint Removal
If all you could think about when you’re reading this guide is that it’s a job I don’t want to do, we understand. However, that means you’ll have to pay a professional to do it for you.
And if this is the route you decide to take, you can expect to spend between $100 and $250 depending on how many windows you need to remove the tint from and where you take it.
For instance, you can expect to spend a lot more for a professional window tint shop in southern California to remove window tint versus a small shop in Iowa.
Just know that if this price is a bit more than you want to spend, removing window tint on your own usually isn’t all that hard and it’s unlikely you’ll mess anything up. So why not give it a try first?
- How to Cover a Broken Car Window (Quick, Temporary Fix) - Sep 13, 2023
- How to Remove Car Window Tint (the RIGHT Way) - Mar 28, 2023
- What is a Safety Glass and How Does It Work? - Feb 18, 2022
Your video was great and what a big help. Going to try removing my car window tint on my own since you showed me how. Wish me luck! Thanks again.
Thanks for the advice on removing the window tint glue. I used an ammonia based window cleaner with a magic eraser and it worked great!
I can’t thank you enough for this! The video was especially helpful. I watched it from start to finish. I just moved to a new state that doesn’t like my tinted windows, and I can’t afford to pay a pro to take them off. I followed your directions, and it came out PERFECT. No glue left on the windows at all, thanks to the clothes steamer! Who knew? Thanks again!
Glad that helped!
I enjoyed the video, but I seem to have a window tint that is made up of tw(2) layers, one clear and one with the actual tint. Is that typical or do I have something strange going on? How do I approach that?
Almost all window tints these days are multi-layered. If the layers are separating, it’s probably really old, weathered tint and it’s going to be tougher to remove. It’s possible it’s actually 2 separate tint installs on top of each other but that’s rare and usually only seen when the car owner self-installed too light a tint and simply put another install on top to “darken” it.
But anyway, heat (heat gun) is going to be your best bet for removal but a bit of careful scraping with a razor might be necessary. For an absolute worst case scenario where the tint is cracked and coming off in tiny pieces, the easiest solution is actually applying another layer of tint (cheap 1-ply), letting it cure and then removing all the layers at once. But this usually isn’t necessary.