Changing your tires regularly is a necessity, whether you’re swapping summer tires for winter tires, swapping a flat with a spare, or putting on an entirely new set.
We live in a busy, busy world, and that means we want things done both well and quickly. Keep reading as we break down the amount of time it takes to get your tires changed, whether that means changing them yourself, going to a shop, or getting them changed by roadside assistance.
Keep in mind that the times given here are rough estimates – your roadside assistance might be particularly fast, and you might know of a Costco that does tire changes quicker than the rest. You get the idea!
See Also – How Much Does Tire Balancing Cost?
Is It Always Faster to Bring My Vehicle to a Professional?
No. In fact, it’s almost never faster to bring your vehicle to a professional – once you know how to change your own tires, going the DIY route is almost always the fastest, least expensive approach.
We’d only advise you to go to the professionals if you’re really uncomfortable changing tires on your own. It is because before you can actually get your tires changed by professionals at shops, you might have to wait for a certain period of time.
Wait times can vary depending on shops. For example, a tire shop in a small rural town is going to have different wait times than a tire shop in the heart of Chicago. But it’s almost always faster to change your tires on your own – once you know how to.
How Long Does It Take to Change a Tire by Road Assistance?
Getting your tire changed by roadside assistance can take longer than (almost) any other method – we say almost because if you’ve never changed a tire in your life, changing your tires yourself will probably take quite a bit longer.
The biggest delay with roadside assistance is the amount of time it takes for them to reach you. Are you just a mile outside of the city? Do you have an AAA membership? Is it a bright, sunny day with great road conditions? They might be there in 20 minutes.
But if you’re stranded in the mountains, 100 miles outside of the nearest town, or in the middle of a snowstorm, be prepared to wait… sometimes a VERY long time. On average, however, it takes about 50 minutes for roadside assistance.
These people change tires for a living, so the actual tire change usually takes 10 minutes or less. You’ll almost always only need one tire changed if you’re getting roadside assistance – but we’ve listed how long it will take to get 4 tires changed just to entertain the hypothetical.
| Number of Tires To Be Changed | Time Taken |
| 1 tire | 1 hour (50 minutes to arrive, 10 minutes to change) |
| 4 tires | 1 hour – 1 hour and a half (50 minutes to arrive, 5 to 10 minutes per tire) |
How Long Does It Take to Change a Tire at Shops?
The answer to this question varies from shop to shop, and from region to region. As such, the numbers we give here aren’t exact – but they should give you an idea of the trends to watch out for.
1. At Walmart
Walmart is one of the cheapest options for tire changes – aside from doing it yourself. That means they get a lot of customers. Like most professionals, they’ll take about 10-15 minutes per tire, and the fee is only about $12-$15 per tire, depending on which package you opt for.
The biggest problem with Walmart is the wait times – they get millions of customers a year. If you’ve got an appointment, you’ll be in and out in about 45 minutes. If there’s dozens of other people looking for a tire change, be prepared to wait.
| Number of Tires To Be Changed | Time Taken |
| 1 tire | Around 45 minutes |
| 4 tires | Around 4 hours |
2. At Costco
Costco has lower wait times than Walmart. They’ve also got a comprehensive tire changing service that includes balancing, at a reasonable $18.99 per tire. They do, however, have a number of restrictions on tire changes. For example, they’ll only change tires that were purchased at Costco.
| The number of Tires Changed | Time Taken |
| 1 tire | Around 45 minutes |
| 4 tires | Around 2 hours |
3. At Firestone
The price for tire changes at Firestone can vary significantly because prices are set by independent stores. In terms of the time to change tires, if you haven’t booked an appointment, expect an average of a two hours wait.
Fortunately, many Firestone stores will give you a discount on your tire change if you were forced to wait past the time your appointment was scheduled. A bit of a money-back guarantee!
| The number of Tires Changed | Time Taken |
| 1 tire | Around 45 minutes |
| 4 tires | Around 5 hours |
4. At Pep Boys
Like Firestone, the time for tire installation at Pep Boys can vary significantly, and we highly recommend you make an appointment. The procedure of tire changes at Pep Boys is slightly more in-depth than most of the other auto shops we’ve seen.
| The number of Tires Changed | Time Taken |
| 1 tire | Around 45 minutes |
| 4 tires | Around 3 hours |
How Long Does It Take to Change a Tire by Yourself?
Finally, we get to the least expensive way to change your tires – changing them yourself. This method can also be the least time-consuming – or the most time-consuming.
It all depends on how much experience you have changing tires. If it’s your first time, it could take 5 hours or more. If you’ve done it several times, however, you should be able to do it about as fast as you could have it done at an auto shop.
| The number of Tires Changed | Time Taken |
| 1 tire | Around 10 – 30 minutes |
| 4 tires | Around 1 hour |
How To Change Your Tires On Your Own (Step-By-Step)
Now that those low wait times and fees have enticed you to change your own tires, we thought it would be a good idea to give you a simple step-by-step guide to doing it yourself.
Tools You Need
- Spare/new tires
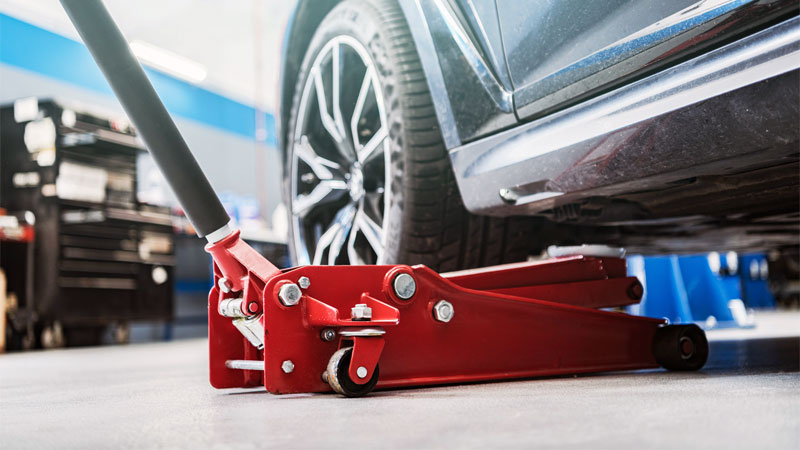
- Car jack
- Lug wrench
- Torque wrench
- Your vehicle owner’s manual
- Wheel wedges – if you don’t have these, other heavy objects like bricks can do in a pinch
It can also be useful to have:
- A flashlight
- Work gloves
- A tire gauge
- A tire inflator
Keep your tools and new or spare tires in a spot that will be easily accessible when you need them, but not so close that you’ll stumble over them while you work.
Step 1. Find a flat, level, and safe surface.
You don’t want your vehicle to roll while you’re trying to change the tires. In situations where there’s traffic nearby (like when you’re changing a flat), try to pull over onto the shoulder of an off-ramp. If you can, try to find a quiet side street or store parking lot. Turn on your hazards.
Step 2. Engage your emergency brake and put your vehicle in park.
Place your wheel wedges or heavy objects over the front and back wheels to keep the vehicle from moving.
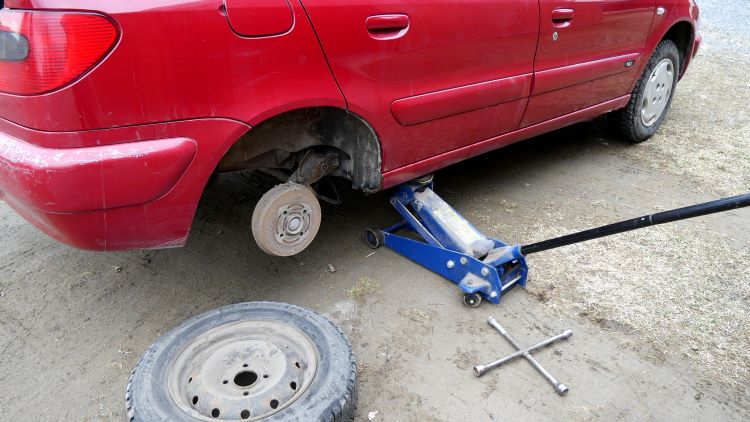
Step 3. Place your jack near the tire you’re going to change first.
Consult your owner’s manual to find out where you’re supposed to place the jack – different vehicles have different strong and weak points. From here, you’ll raise your jack so it’s supporting, but not lifting, your vehicle.
Step 4. Loosen (but don’t remove) the lug nuts.
You may need to remove the hubcap on the wheel before doing this. Your lug wrench should have a hubcap remover on its end – cover it with a cloth, place it on the edge of your hubcap, and pry it off. From there, you can access the lug nuts – rotate them counterclockwise to loosen them with the lug wrench.
Use your body weight if necessary – lug nuts are screwed tight. Be aware, however, that using your body weight can strip the nuts. Note that doing this with your wheels still on the ground ensures that you’re rotating the nuts, and not the wheel.
Step 5. Lift your vehicle with the jack.
You may need to pump or crank the jack, depending on the model. If the jack isn’t standing straight, or if the vehicle seems unstable, lower it, reposition the jack, and lift again. The vehicle doesn’t have to go too high off the ground – just far enough so you have clearance to remove the old tire and put on the new one.
Step 6. Remove the tire.
Remove the lug nuts the rest of the way – place them in a secure location. Then, take off the tire. You can place the tire below the vehicle in case of jack failure.
Step 7. Install the new tire.
Align the rim of the new or spare tire with the wheel bolts, then place it on the bolts. From there, hand place and tighten the lug nuts onto the wheel. Once they’re snug, tighten them further (but not all the way) with your lug wrench.
Lug nuts should be tightened in a star pattern, working diagonally from the first lug nut you tighten.
Step 8. Lower the car partially, then tighten the lug nuts fully.
Lower the car enough so your tire makes contact with the ground and the suspension compresses slightly. Then using a torque wrench, tighten the lug nuts (or bolts) to the manufacturer’s recommended torque specifications that will be found in the owner’s manual.
Step 9. Lower the car to the ground fully, and remove the jack.
Having followed these steps, you’ve changed a tire! Congratulations. If it was a flat tire, put it in your trunk and take it to an auto shop – spares aren’t meant to be used for too long.
If it was a new tire, repeat the steps we laid out above for each other tire. You can expedite the process by lowering the car onto jack stands, and by using power tools.
Tire Rotation Pattern
After you have your tires changed, you should follow the recommended schedule to rotate your tires. To maintain your tires properly, tire rotation plays an important role. This process helps to extend the lifespan of your tires because tire rotation helps them to wear evenly.
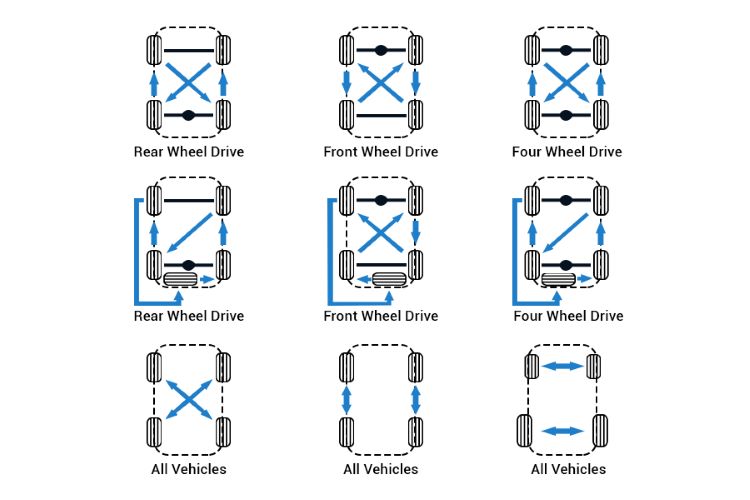
You are maybe wondering how to rotate tires correctly? The process differs depending on the vehicle types (rear-wheel drive/front-wheel-drive/four-wheel drive) you have and the number of tires you use to rotate with.
Let’s take the 4-tire rotation and 5-tire rotation pattern for an example. These two processes are different because while the 5-tire rotation pattern involves the spare tire, the 4-tire rotation doesn’t.
As long as the spare tire in the process should not be marked for the temporary use and be proper for being included in the 5-tire rotation, this rotation pattern will be beneficial for your tires.
Refer to the image above to see how each type of tire rotation works.
See Also – How to Fix Cracked Tires: A Detailed Step-By-Step Guide
- What the Letters and Numbers On an Automatic Gear Shift Mean - Sep 12, 2022
- How Long Does it Take to Change Tires? (Professional vs DIY) - Jun 8, 2022
- 2022 Ford Bronco EcoBoost Performance & Off-Roading Specs - Jun 2, 2022


Get a torque wrench if you are planning to change your own tires. A click-type torque wrench is best. Torque the nuts on the wheel studs to whatever is written in the owners manual. Do not over-tighten. Re torque after 60 miles/100 km.